
Create and share maps
Draw snow routes, project areas and other places on a map, then share it with residents.
What maps are for
Maps let you show residents where things are: snow routes, construction zones, park boundaries, polling places. You draw shapes on the map, give each one a name, description and color, and publish the map. Residents can then open it from a link, a website page or a post.
Before you start
- Who can do this: Staff who can create content. Staff with the Standard Admin (View Only) role can't create or change maps.
- Where maps live: Maps are kept in Content, alongside your documents and folders.
- Residents only see published maps. New maps start as drafts.
Create a map
- In the left sidebar, click Content.
- Open the folder you want the map in.
- Click + (Add content), then Add Map.
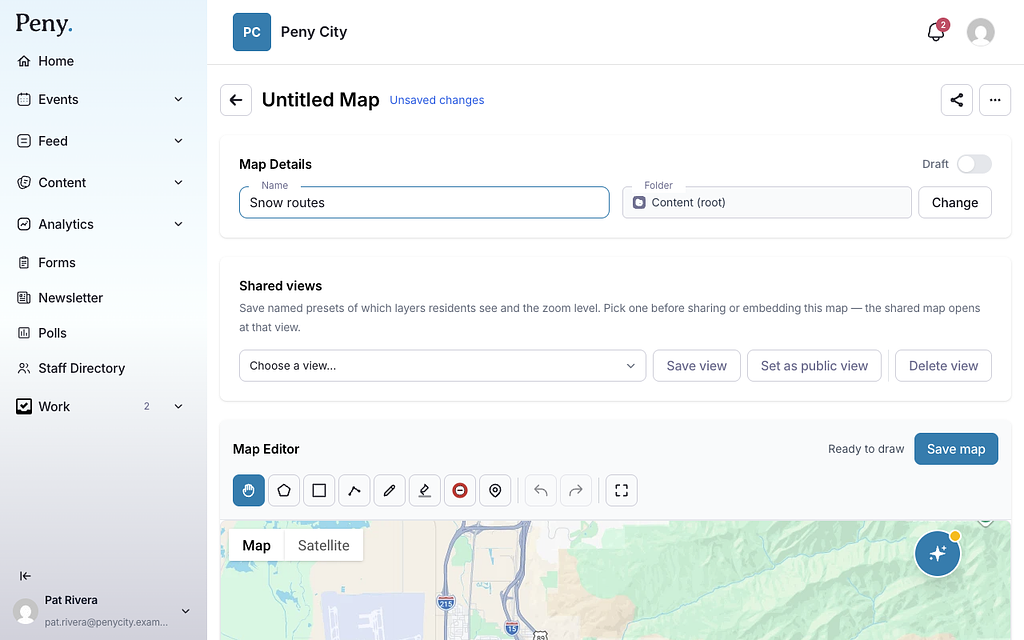
- A new map called Untitled Map opens in the map editor.
- Under Map Details, type a Name, like "Snow routes".
- To put the map in a different folder, click Change next to Folder, pick a folder, and click Choose.
Draw on the map
The drawing toolbar sits on the map. Hover over a tool to see its name.
| Tool | What it does |
|---|---|
| Pan Mode (Hand) | Move around the map without drawing. |
| Draw Polygon | Click to add points, then click the first point to finish. |
| Draw Rectangle | Click and drag to draw a rectangle. |
| Undo (Ctrl+Z) | Undo your last change. |
| Redo (Ctrl+Y) | Redo a change you undid. |
| Toggle Fullscreen | Make the map fill the screen. |
Your city may also have these tools:
| Tool | What it does |
|---|---|
| Draw Line | Click to add points along a road, then click the last point to finish. |
| Draw Freehand (Pen) | Click and drag to draw. Release to finish. |
| Highlighter | Click and drag to draw a highlight. Release to finish. |
| Place Pin | Click on the map to drop a pin. |
Don't see the line, pen, highlighter or pin tools? They may not be turned on for your city yet — email support@penyapp.com.
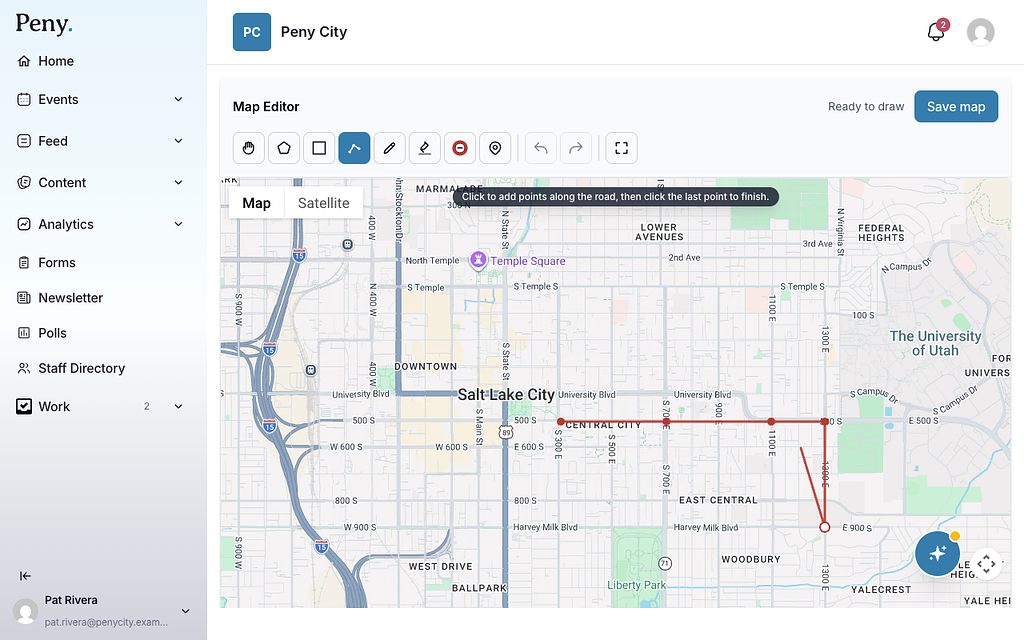
To change a shape, click it and drag its points. Freehand drawings can't be reshaped.
Name and style a shape
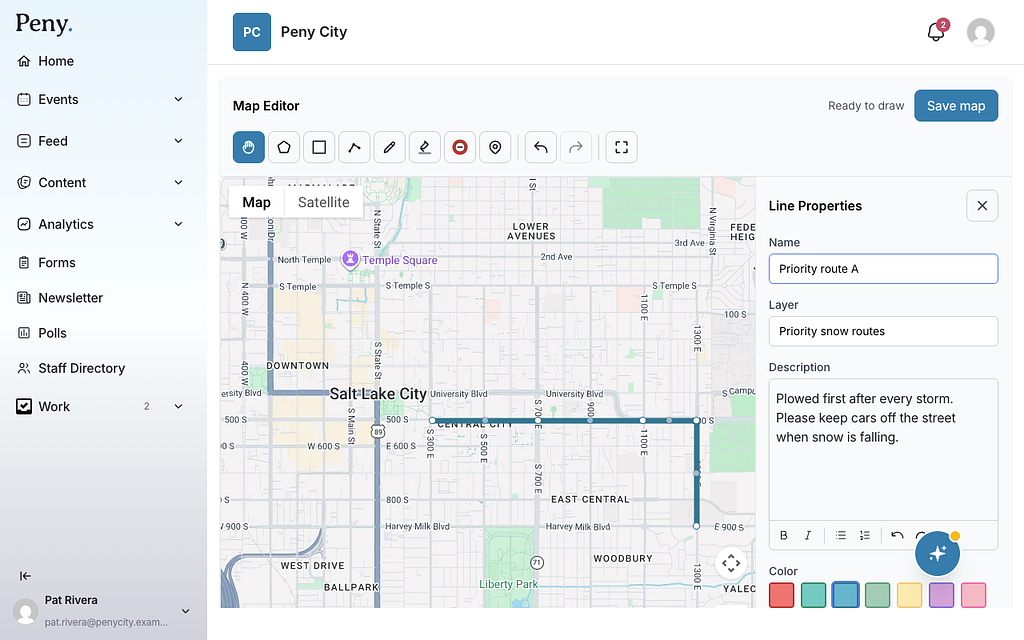
- Finish drawing a shape, or click an existing one. Its properties panel opens next to the map.
- Type a Name. New shapes start with names like "Feature 1" or "Line 1".
- Optional: type a Layer name to group related shapes, like "Priority routes".
- Optional: add a Description.
- Choose a Color. If your city has the extra drawing tools, you can also set Thickness, Opacity and, for lines, Line style (solid, dashed or dotted).
- For pins, choose an Icon and a Size.
- Close the panel with the × button, then click Save map.
To delete a shape, open it and click Delete Feature (or Delete Line or Delete Icon).
The Features list
The Features card below the map lists every shape with its Layer, Name and Description.
- Use the Layers buttons to show or hide a whole layer.
- Use a row's menu to Edit, Duplicate or Delete a shape. Deleting from the list happens right away. Click Undo if you change your mind.
Import shapes from GIS
If your shapes already exist in GIS software, import them instead of drawing them.
- Open the map's ⋯ menu and click Import Shapefile.
- Choose a ZIP file that contains the shapefile's .shp, .shx and .dbf files (and the .prj file, if you have one). The ZIP can be up to 50 MB.
- Wait for "Successfully imported" and the number of shapes.
Each import can bring in up to 10 layers, with up to 2,000 shapes per layer.
Save the map
Maps don't save automatically. Click Save map after you make changes. The status changes from Unsaved changes to Saving… and then Saved. If you try to leave with unsaved changes, Peny asks if you want to leave without saving.
Publish and share the map
Publish
In the Map Details card, click the switch next to Draft. It changes to Published right away. You can also publish a map from the Published switch on its row in Content. Only published maps can be seen by residents. Remember to click Save map for any drawing changes too.
Share a link
- Click the share icon (Share) at the top of the map editor.
- If the map is still a draft, Peny may ask Publish and share this map? Click Publish and Share.
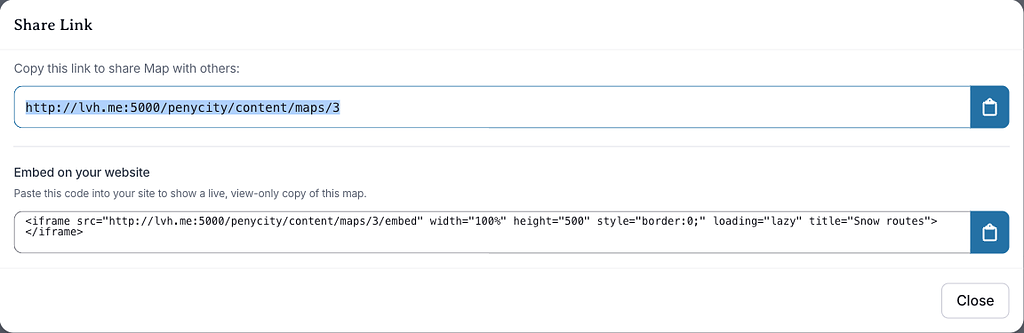
- Click the clipboard button next to the link (Copy to clipboard).
- Paste the link into an email, a post or anywhere else.
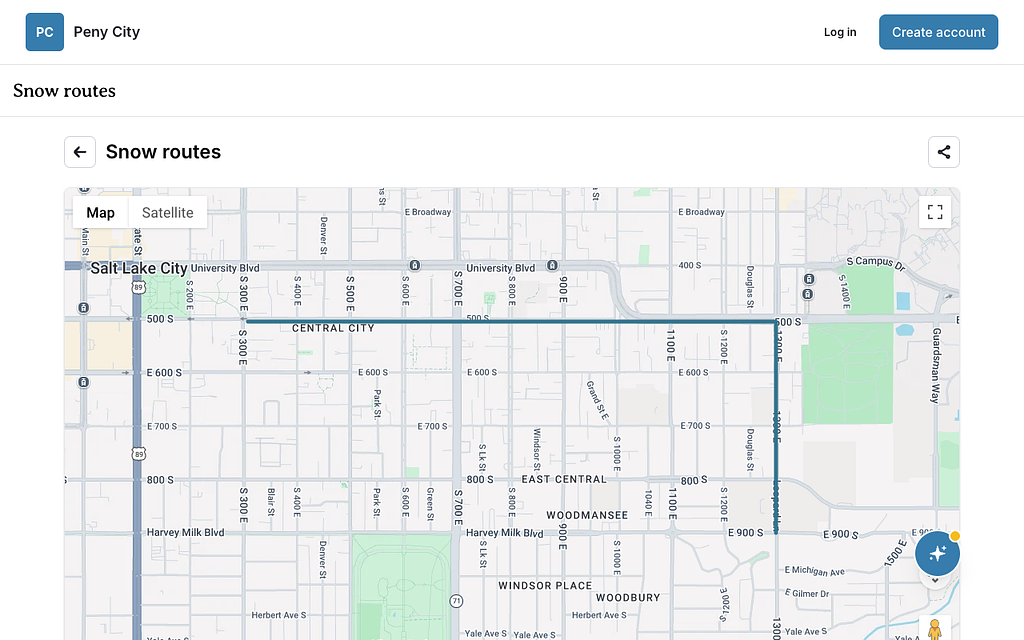
Put the map on a website page
Add a Map block to a page in the website builder and choose your map. Only published maps show on website pages. If the map is still a draft, the block tells you it isn't published yet, and residents won't see it.
Share the map in a post
Open the map's ⋯ menu and click Share to Feed. Peny creates a draft post with the map in it and opens the composer, so you can add your message and publish. See Create and publish a post.
Embed the map on another website
In the Share Link window, find Embed on your website and click the clipboard button beside the code (Copy embed code). Paste the code into the other website to show a live, view-only copy of the map.
Choose what residents see with shared views
A shared view saves which layers are visible and how far the map is zoomed in, so residents open the map exactly where you want them.
- Set up the map the way you want residents to see it: show or hide layers and zoom in.
- In the Shared views card, choose Create New View.
- Type a View name, like "Downtown construction".
- Click Create View.
- To make it the view residents get by default, click Set as public view.
When you share or embed the map, choose a view under Open at view. Embeds and posts that open at a shared view are locked, so residents can't move or zoom the map.
Don't see Share to Feed, embedding or shared views? They may not be turned on for your city yet — email support@penyapp.com.
Record a road closure
- Open a saved map.
- Click Draw Road Closure in the toolbar.
- Click along the closed road, then click the last point to finish.
- In Road closure details, fill in the Street / road name, Type and Direction. Tick Full closure (road completely closed) if no traffic can get through.
- Set when it Starts, and optionally when it Ends and a Description.
- Click Save closure.
Don't see this? It may not be turned on for your city yet — email support@penyapp.com.
Delete a map
- In Content, open the map's ⋯ menu and click Delete.
- Click Delete to confirm.
The map moves to Content › Trash. You can Restore it from there. Before deleting a map, check whether any website page or post shows it.