
Build forms and manage responses
Build an online form, share it with residents, and review and export what they send in.
What forms are for
Forms let residents send your city information online: a pothole report, a facility request, a program sign-up. Residents don't need to sign in to submit a form. Each submission is saved as a response you can read, print and export.
Before you start
- Who can build forms: Admins and staff members who can create content. Staff with the Standard Admin (View Only) role can see forms but can't create or change them.
- Who can see responses: All city staff can see the list of responses and download them as a spreadsheet. Opening a single response requires an admin role.
- Find everything under Forms in the left sidebar.
Find your forms
- In the left sidebar, click Forms.
- Use the search box at the top to find a form by name.
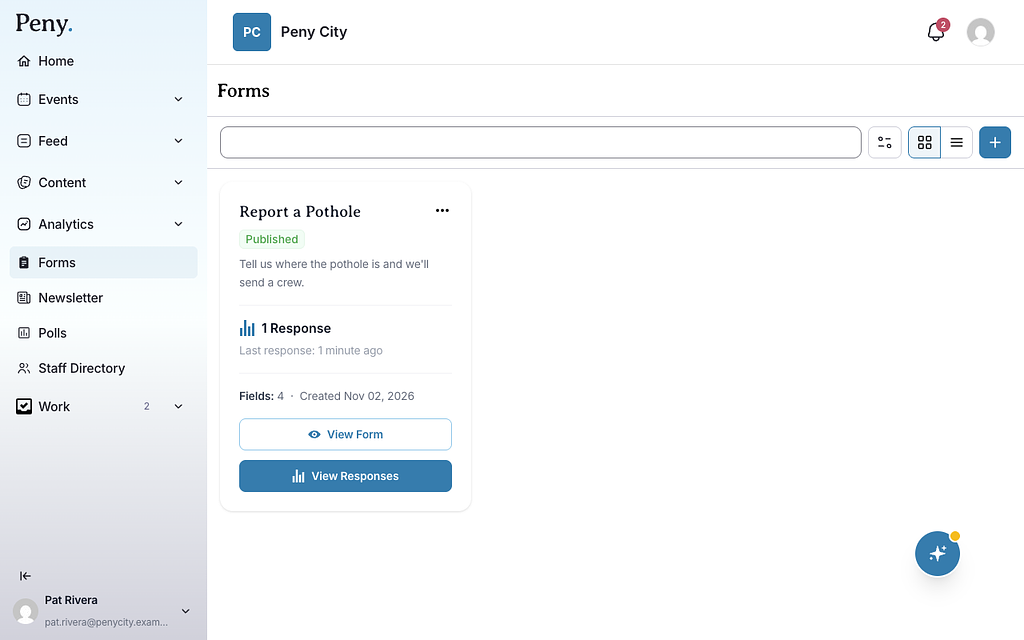
- To see drafts or archived forms, click the filter button and tick Published, Drafts or Archived under Status. Only published forms show the first time you visit.
- Switch between Grid view and List view with the toggle at the top.
Each form card shows its status (Published, Draft or Archived), how many responses it has, and when the last one came in.
Create a form
- On the Forms page, click the + button (New form) at the top right.
- Under Form Settings, type a Title.
- Add a Description if you want to explain the form. Residents see it above the questions.
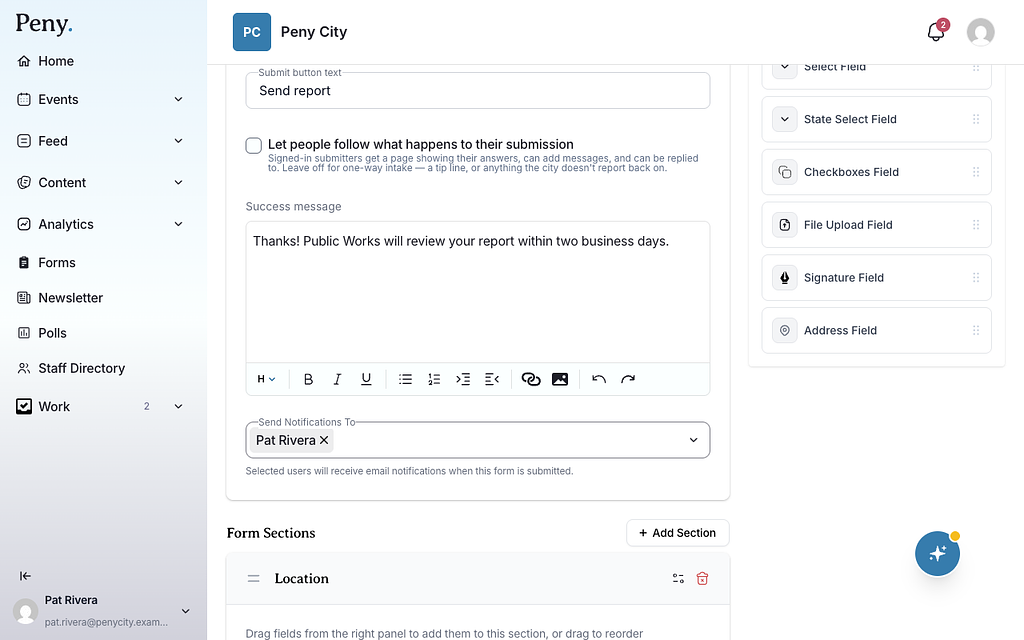
- Type the Submit button text, for example "Send report".
- Type a Success message. Residents see it after they submit.
- Optional: in Send Notifications To, choose who gets an email when someone submits the form. See Get notified about new responses below.
- Under Form Sections, add your questions. See the next section.
- Click Save Draft to keep working later, or Publish to make the form live.
Title, submit button text and success message are required.
Add questions
A new form starts with one empty section.
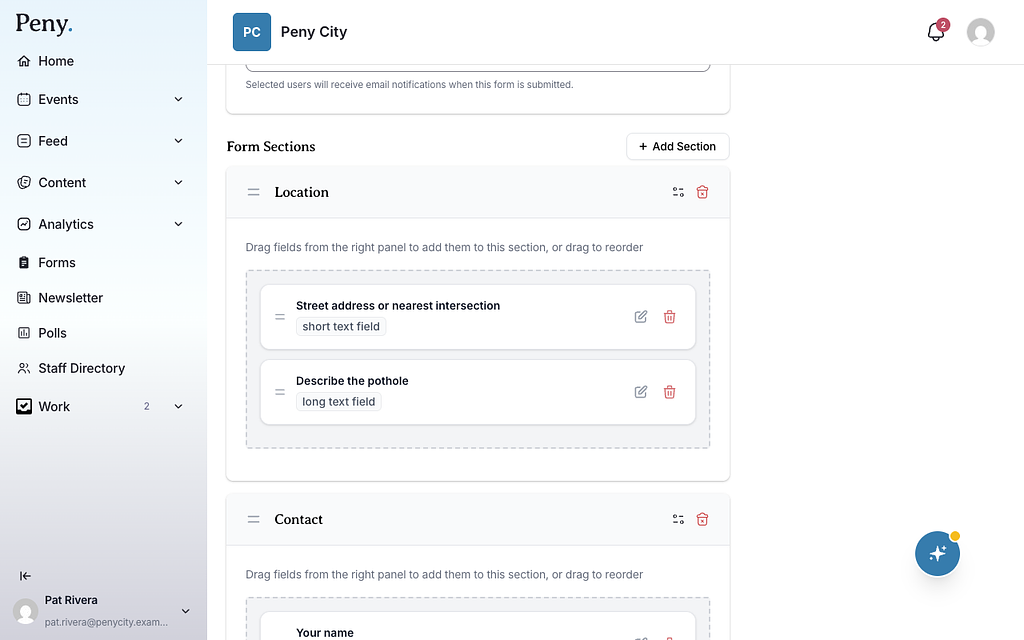
- Find the field type you want in the Add Field panel on the right.
- Drag it into the section.
- Click the pencil icon (Edit field) on the field to open its settings.
- Type the Field Label. This is the question residents see.
- Optional: add Help Text to explain what you're asking.
- Turn on Required Field if residents must answer it.
- Click Done.
To change the order, drag a field by its handle. To delete one, click its trash icon (Remove field). On a phone, use Add field in the section header and the up and down arrows to reorder.
Field types
| Field type | Use it for |
|---|---|
| Short Text Field | A short answer, like a name. You can add Placeholder Text. |
| Long Text Field | A longer answer or description. |
| Date Field | A date. |
| Email Field | An email address. |
| Phone Field | A phone number. |
| Select Field | A dropdown where residents pick one of your Options. |
| State Select Field | A dropdown of US states. |
| Checkboxes Field | A list of Options residents can tick. |
| File Upload Field | A photo or document. One file per question, up to 20 MB (JPG, PNG, GIF, WebP, PDF, Word, CSV or Excel). |
| Signature Field | A signature residents draw or type. |
| Address Field | A street address. |
For dropdowns and checkboxes, click Add Option to add each choice. Placeholder text can be up to 55 characters.
Show a question only when it applies
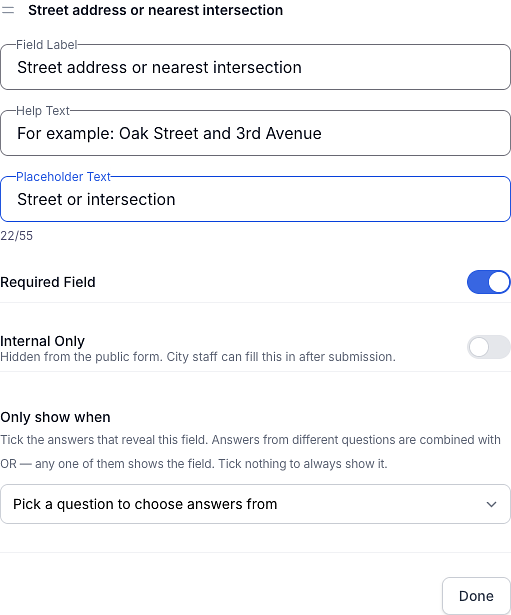
You can show a question only when a resident picks a certain answer to an earlier Select Field or Checkboxes Field question.
- Open the field's settings.
- Under Only show when, pick the earlier question.
- Tick the answers that should reveal this field.
- Click Done.
The field gets a Conditional badge in the builder.
Organize questions into sections
- Click Add Section to start a new group of questions.
- Open a section's settings to give it a Section Title and choose Desktop Columns (1 to 4 columns).
- Drag a section by its handle to move it. Click Remove section to delete it. There's no undo, so check before you click.
Internal-only fields
Some information is for staff only, like a work order number or the crew assigned. Turn on Internal Only in a field's or section's settings, and that field is "Hidden from the public form. City staff can fill this in after submission." These fields show an Internal badge in the builder.
Admins fill them in later on the response's page, in the Internal Fields box, then click Save Internal Fields.
Don't see this? It may not be turned on for your city yet — email support@penyapp.com.
Repeatable sections
Turn on Repeatable in a section's settings to let residents add the section more than once, for example a second contact person. Residents click Add another followed by the section's title to repeat it, up to 20 times. A repeatable section can't be internal-only or contain conditional questions.
Don't see this? It may not be turned on for your city yet — email support@penyapp.com.
Let residents follow their submission
Tick Let people follow what happens to their submission in Form Settings if your city will report back. Residents who were signed in when they submitted get a page showing their answers, can add messages, and can get replies from you. Leave it off for one-way forms like a tip line.
Get notified about new responses
- Open the form for editing.
- In Form Settings, click Send Notifications To.
- Choose the people who should hear about new submissions. Only staff with an admin role appear in this list.
- Click Save Draft or Publish.
Each person gets an email titled New Form Submission with the form name, when it was submitted and who sent it (or Guest if they weren't signed in), plus a View Submission button. They also get a notification in Peny. To stop the emails, remove the person from the list.
Publish and share a form
- Open the form and click Publish.
- On the Forms page, open the form's ⋯ menu and click Copy Link.
- Paste the link into a post, an email or your website.
You can also put the form right on a website page with the Form block. Residents fill it in without leaving the page.
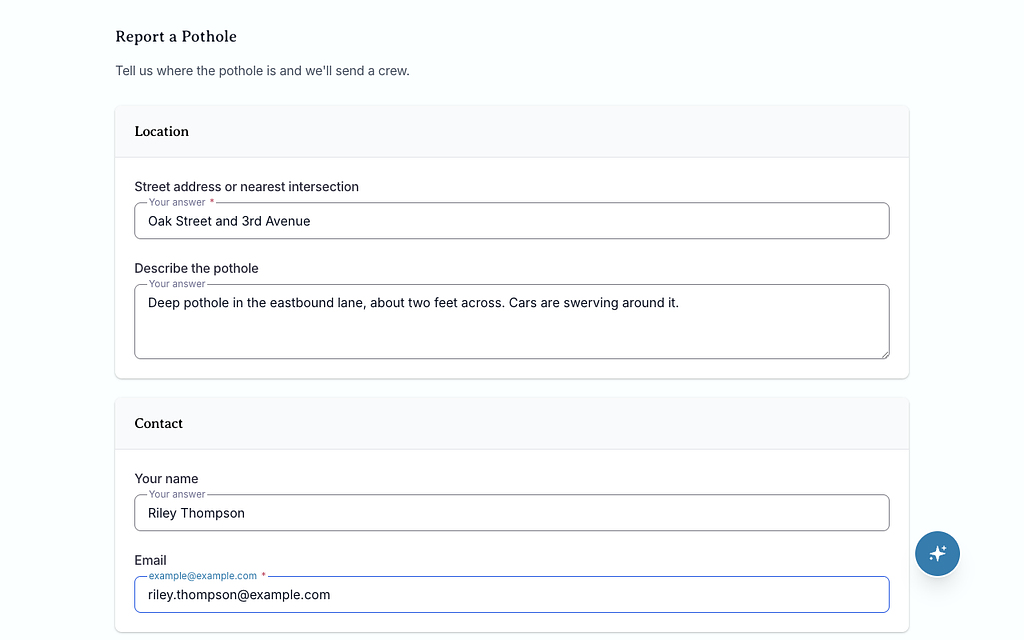
When a resident submits, they see Thank You! and your success message, with a Submit Another Response button.
Change a published form
- On the Forms page, open the form's ⋯ menu and click Edit Form.
- Make your changes.
- Click Publish to update the live form, or Save Draft to save your changes without publishing them.
What happens depends on whether the form already has responses:
- No responses yet: Publish updates the live form. Save Draft turns the whole form back into a draft, which takes it offline until you publish again.
- Has responses: Save Draft saves your changes as a separate draft, and the live form keeps working. When you click Publish, Peny asks Publish New Version? Click Publish New Version. The old version and its responses stay available.
To see older versions, click the version chip on the form's card (for example v2) to open Version History. Past versions can't be edited. Old links to the form always open the current version.
Close, copy or delete a form
Open the form's ⋯ menu on the Forms page:
- Archive stops new submissions. Residents who open the link see "This form is no longer accepting submissions." Click Unarchive to publish it again.
- Duplicate makes a draft copy named "title (copy)" and opens it for editing.
- Delete moves the form, with all its versions, to Content › Trash. It's permanently deleted after 30 days. You can Restore it from the trash before then.
In List view, tick several forms to Publish, Archive, Unarchive or Delete them at once.
Review responses
- On the Forms page, click View Responses on the form's card.
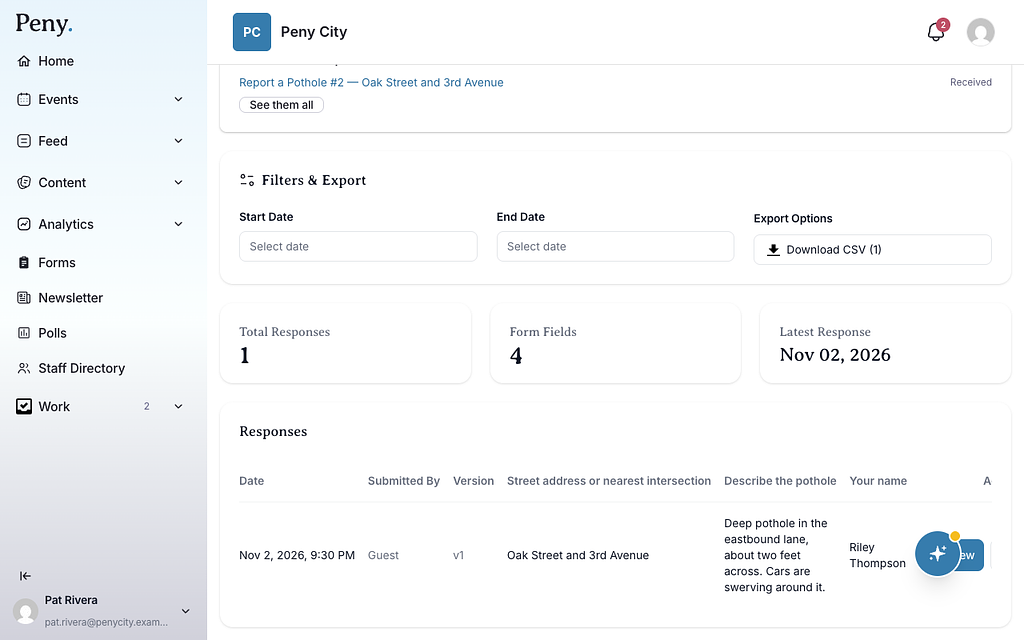
- The page shows Total Responses, the number of form fields and the Latest Response.
- The Responses table lists each submission with its Date, who it was Submitted By (or Guest), the form Version and the first few answers.
- Click View to open a response. On that page you can Print it or Download CSV.
Export responses to a spreadsheet
- Under Filters & Export, choose a Start Date and End Date if you only want some responses.
- Click Download CSV. The button shows how many responses will be included.
The file has one row per response and one column per question, across every version of the form. Uploaded files and signatures appear as download links.
Delete a response
- In the Responses table, click the trash icon (Delete response) on the row.
- Click Delete to confirm. This can't be undone.
Track submissions as cases
If your city uses cases, each submission becomes a case with a status, an owner and a due date.
- In the left sidebar, click Work, then the Cases tab.
- Cases are grouped as Received, Being worked, Resolved and Closed.
- Use the buttons on a case card to move it along: Start, Resolve, Close or Reopen.
- Click a case to open its details. There you can set Who owns this case, choose a Due by date, add an internal note ("Only the city sees this."), and Message the resident.
- Click Open the full submission to see every answer.
You can also start from a form's responses page. Its What happens to submissions panel lists the form's open cases, and See them all opens the full list.
You can only message residents who were signed in when they submitted, on forms that let people follow their submission. Cases are available to city admins.
Don't see this? It may not be turned on for your city yet — email support@penyapp.com.